Learn how to auto fit column widths in Excel with multiple methods including keyboard shortcuts and VBA automation. This guide covers the basics to advanced techniques and troubleshooting tips to help you work more efficiently in your spreadsheets.
by Mihir Kamdar / Last Updated:
After reading this guide, you’ll be equipped with the knowledge to:
Download our step-by-step tutorial file now by clicking on the icon below and follow along to enhance your Excel skills practically and efficiently!
Working efficiently in spreadsheets is key to productivity. One of the common problems users face is adjusting column widths to show all the data. Manually resizing columns can take a long time especially with big datasets. The Excel Autofit feature is the quick fix by auto adjusting column widths to fit the data. Knowing how to use this feature will make your data more readable and workflow more efficient.
Autofit is an Excel feature that auto adjusts the width of columns (and the height of rows) to fit the cell content, ensuring the proper cell size. Excel cells expand automatically to fit the content using the Autofit feature, which can be accessed through the Excel ribbon. This way you don’t have to manually resize each column or row. Autofitting makes your spreadsheet look better and more professional and easier to read.

There are several ways to auto fit column widths in Excel. Here are the methods:
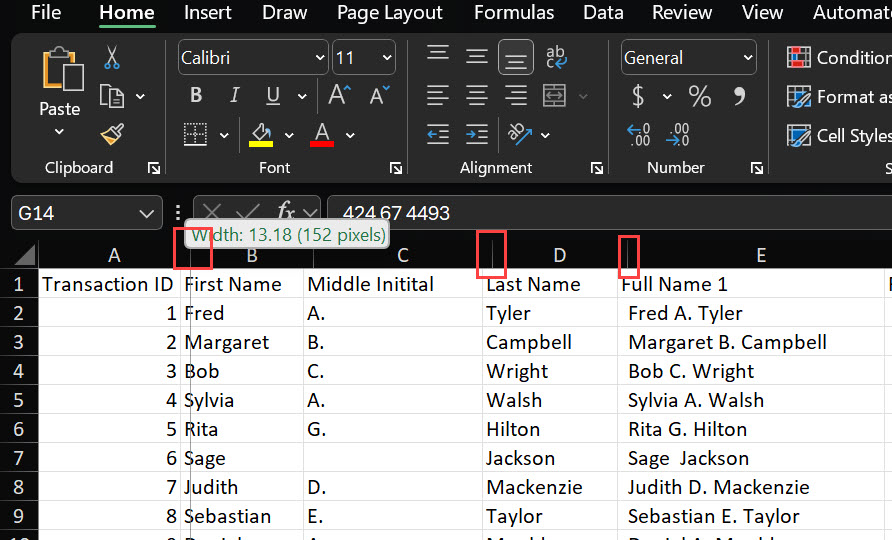
Select Columns: Click on the column letter(s) you want to adjust. To select one column, click on its letter. To select multiple columns, click and drag across the column letters.
Double-Click the Edge: Move your cursor to the right edge of any selected column header until it becomes a double arrow.
Autofit: Double-click the edge. Excel will auto adjust the column width to fit the longest cell in each column.


Windows:
Select the columns or one row you want to auto fit.
Alt + H, O, I

If you want columns to auto fit when data changes or need to adjust the height of multiple rows, you can use VBA (Visual Basic for Applications) to automate this. By writing an event driven macro, Excel can auto adjust column widths when you enter or change data in the worksheet.
Step by Step Guide to VBA:
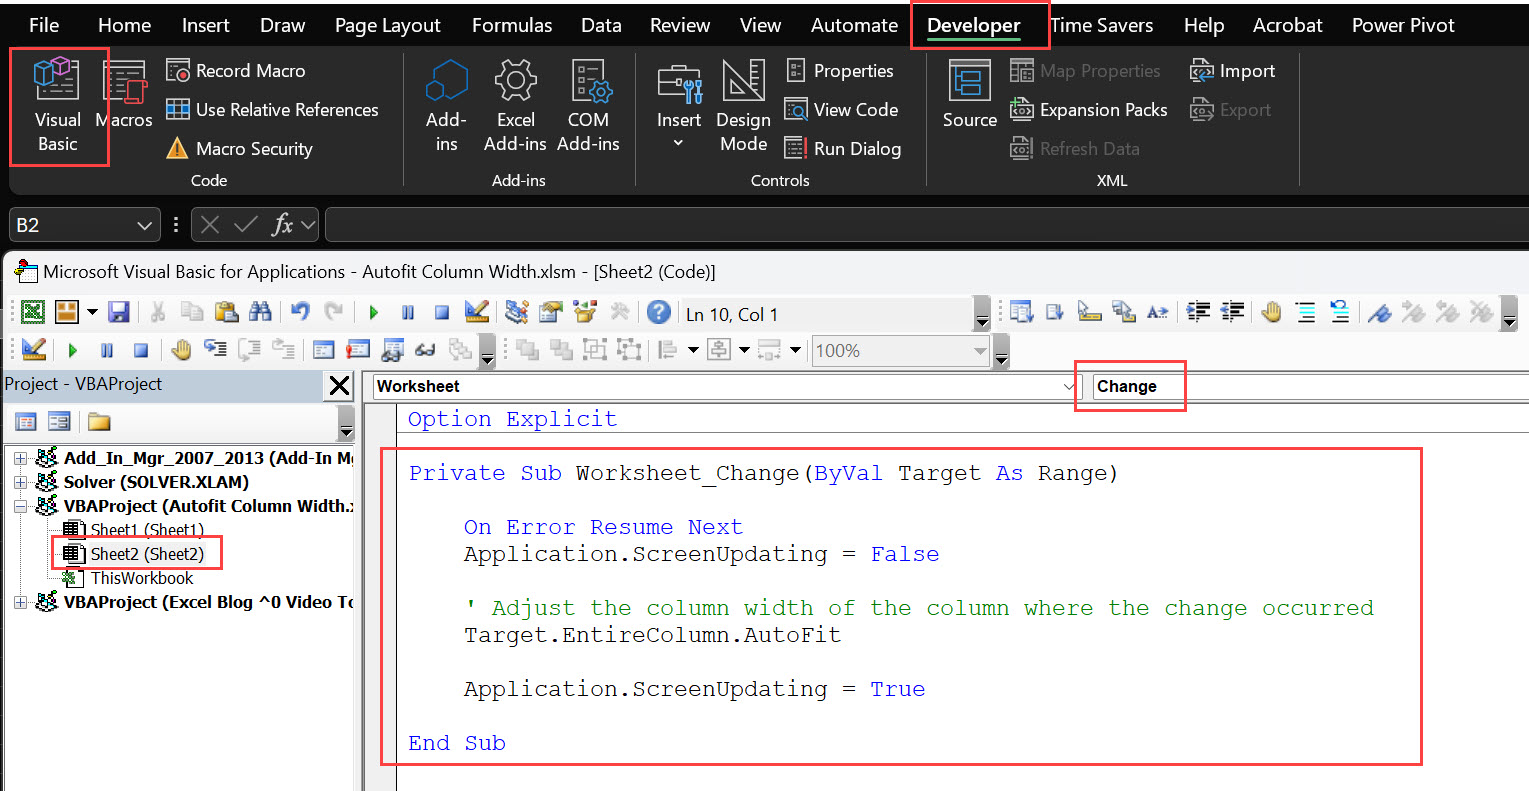
Open the Visual Basic Editor (VBE):
Alt + F11 in Excel to open the VBE.
Go to Worksheet Module:
In the Project Explorer window (usually on the left side), find your workbook’s name.
Click Microsoft Excel Objects.
Double click on the sheet where you want the code to run (e.g. Sheet1).
Enter the VBA Code:
Private Sub Worksheet_Change(ByVal Target As Range) On Error Resume Next Application.ScreenUpdating = False ' Adjust the column width of the column where the change occurred Target.EntireColumn.AutoFit Application.ScreenUpdating = True End Sub Paste the following code into the worksheet module:
Save Your Workbook as Macro-Enabled Workbook:
Enable Macros When Opening the Workbook:
When you open the workbook, you may be prompted to enable macros. Click Enable Content to run the VBA code.
How the VBA Code Works:


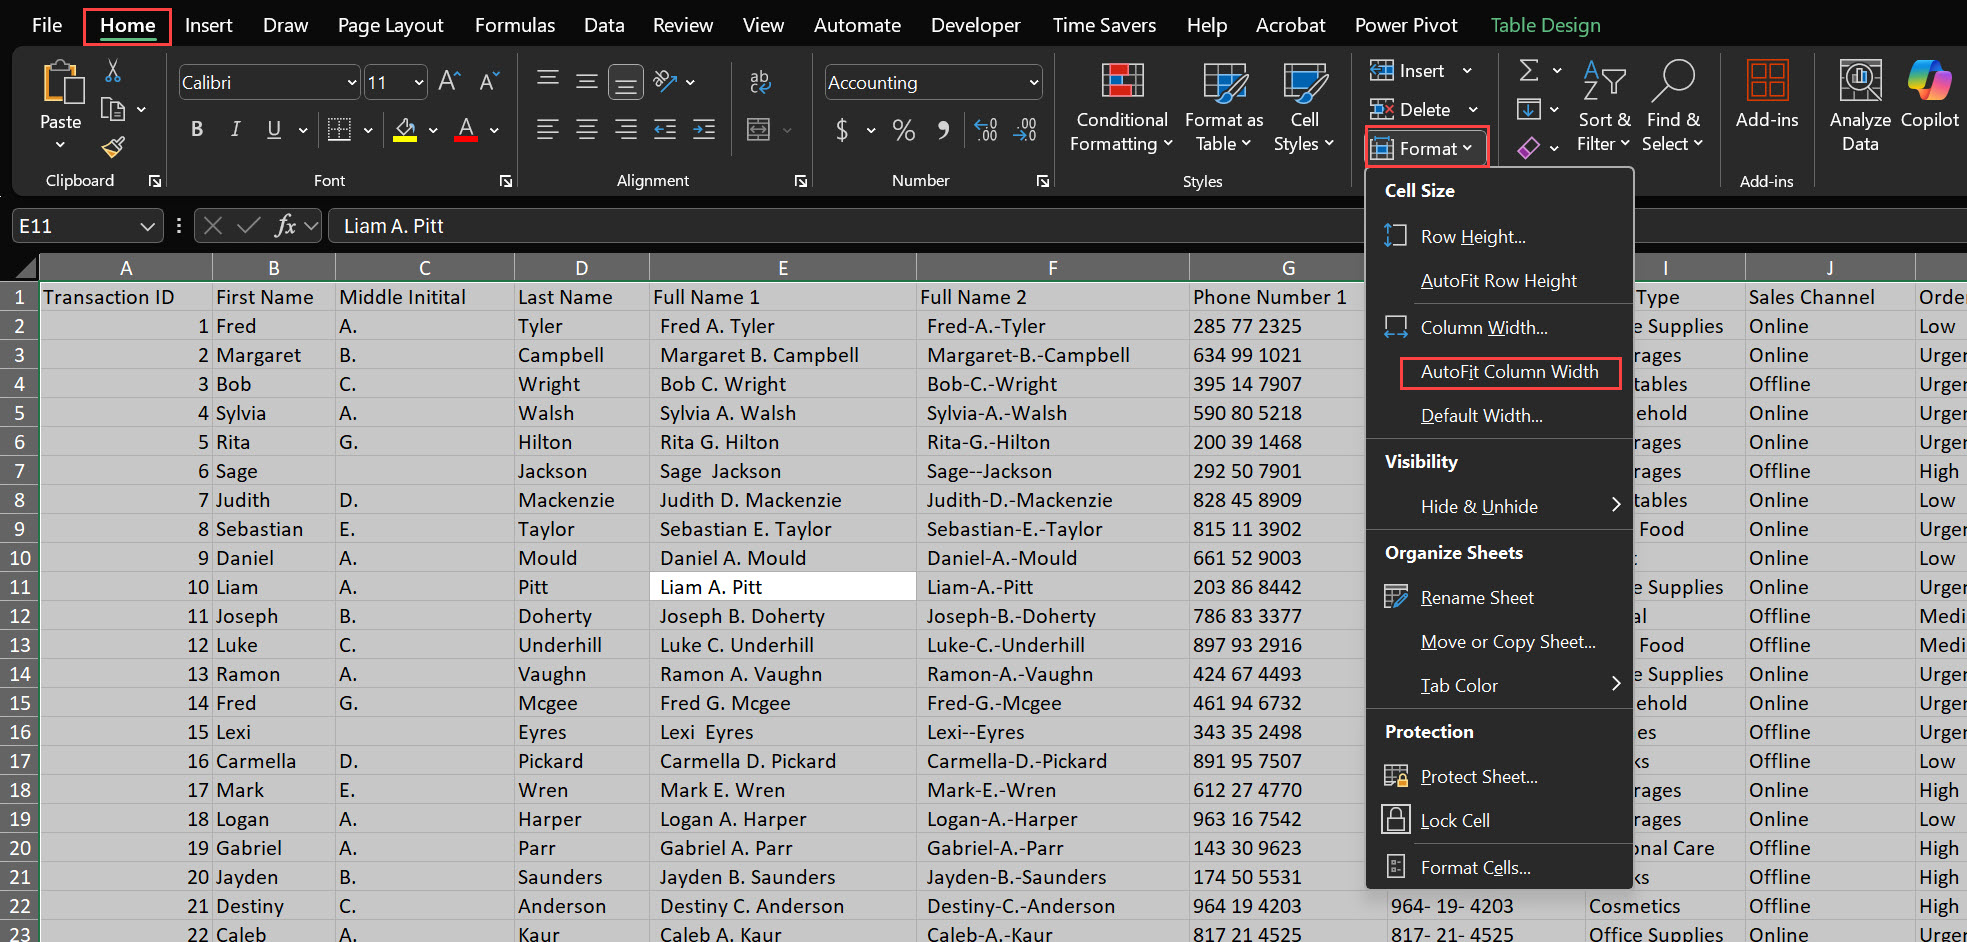
To auto fit column width and row in Excel:
Auto fit may not work because:
Solution:
The auto fit option is under the Home tab:
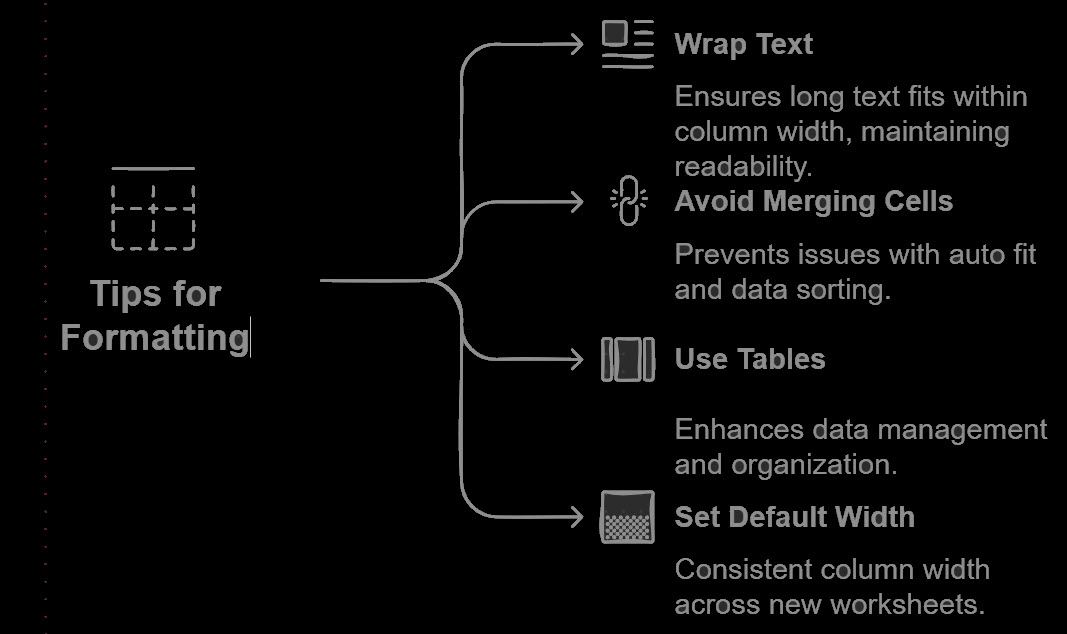
Auto-fitting column width in Excel can be a game changer for your productivity and spreadsheet readability. Whether you’re manually auto-fitting columns or automating with VBA, these tips will help you present your data clearly and professionally without having to adjust manually all the time.

92% of students automate workflows, build CEO-ready dashboards, and streamline collaboration in < 1 hour. Don’t miss out!
🎯Master every Office 365 tool like Excel, Word, PowerPoint, Teams, Outlook and OneNote.
🎯Streamlined approach—no fluff, just rapid skill-building.
🎯Eliminate tedious tasks with intelligent automation.
🎯Transform everyday workflows into strategic power moves.
🎯Boost productivity and impress every boss.
🎯Real-World Projects – directly translate lessons into workplace wins.